


有特色的模板
og体育首页ONE Subscrioption


Hello! 本视频教程展示了如何 update the footer layout using the “TM Mega Layout“ module in PrestaShop模板.
还有一个伟大的 module included in our PrestaShop模板 called “TM Mega Layout”.
The module 是为了让你创建自定义布局(预设)挂钩,并显示在网站上,而不是默认的位置.
它允许你创造不同 hook 加价并根据您的需要进行修改,我们认为这是一个很大的优势.
让我们来学习如何管理它 module.
本教程假设您已经登录到PrestaShop管理区域.
Navigate to Modules and Services ->Modules and Services tab:

Then use the Search field in the Modules List 节查找 “TM Mega Layout” module:

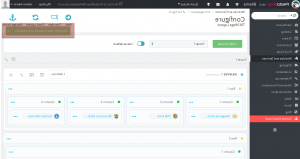
Click on the “Configure” 按钮旁边的 module 打开它进行编辑:

Now that the module 编辑界面在您面前打开,选择 hook 您想要编辑 layout of.
假设您想要更改站点的外观 footer.
Click the “DISPLAYFOOTER” tab to have the footer hook 编辑界面打开:

在这里,您可以选择现有的预设或添加自己的 preset with a specific footer layout.
你也可以将其中一个预设设置为网站的默认设置:

控件底部的行和列也可以进行管理 hook 的编辑界面 footer layout 满足你的愿望.
假设你想改变你的 footer columns.
Look for the Row 1 section with Column 1, Column 2, Column 3 and Column 4 assigned to it.

单击要更改顺序的列,按住鼠标左键即可 drag and drop 将列移至所需位置:

现在你有了 类别块 module 显示在第一列和 CMS Block module 第二栏:

另一个好处是更改被保存 “on-the-fly” 也就是说你不用动手了 “Update” 每次你改变一些东西:
导航到您的商店 frontend 并刷新页面以查看所应用的更改.
You can see the Categories module 现在显示在第一列:

本教程到此结束. 现在你知道怎么做了 update the footer layout using “TM Mega Layout” module in your PrestaShop模板.
请随时查看下面的详细视频教程:
PrestaShop 1.6.x. 如何更新页脚布局与“TM Mega布局”模块